- RFQ
- BOM
-
Contact Us
Tel: +86-0755-83501315
Email: sales@sic-components.com


- Chinese
- English
- French
- German
- Portuguese
- Spanish
- Russian
- Japanese
- Korean
- Arabic
- Irish
- Greek
- Turkish
- Italian
- Danish
- Romanian
- Indonesian
- Czech
- Afrikaans
- Swedish
- Polish
- Basque
- Catalan
- Esperanto
- Hindi
- Lao
- Albanian
- Amharic
- Armenian
- Azerbaijani
- Belarusian
- Bengali
- Bosnian
- Bulgarian
- Cebuano
- Chichewa
- Corsican
- Croatian
- Dutch
- Estonian
- Filipino
- Finnish
- Frisian
- Galician
- Georgian
- Gujarati
- Haitian
- Hausa
- Hawaiian
- Hebrew
- Hmong
- Hungarian
- Icelandic
- Igbo
- Javanese
- Kannada
- Kazakh
- Khmer
- Kurdish
- Kyrgyz
- Latin
- Latvian
- Lithuanian
- Luxembou..
- Macedonian
- Malagasy
- Malay
- Malayalam
- Maltese
- Maori
- Marathi
- Mongolian
- Burmese
- Nepali
- Norwegian
- Pashto
- Persian
- Punjabi
- Serbian
- Sesotho
- Sinhala
- Slovak
- Slovenian
- Somali
- Samoan
- Scots Gaelic
- Shona
- Sindhi
- Sundanese
- Swahili
- Tajik
- Tamil
- Telugu
- Thai
- Ukrainian
- Urdu
- Uzbek
- Vietnamese
- Welsh
- Xhosa
- Yiddish
- Yoruba
- Zulu
- Kinyarwanda
- Tatar
- Oriya
- Turkmen
- Uyghur
Details Of Calibrating High-Precision Amplifiers
Calibrating high-precision amplifiers—there’s a reason it feels like a mix of science and a little bit of art. It’s not just about tweaking a trim pot and calling it done. These amplifiers, the ones that handle microvolts of signal or need to stay accurate across wide temperature swings, they demand patience. You start by understanding what makes them drift, what throws off their precision in the first place. Offset voltage, gain error, noise that creeps in from the power supply or the surrounding circuit—all of these need to be accounted for, and calibrated out if you want reliable results.
Let me tell you, the environment matters more than you’d think. Calibrating a high-precision amp on a cluttered workbench with fluorescent lights buzzing overhead? Not a great idea. Those lights, the AC hum from your soldering iron, even the static from your shirt—they can all inject noise into the signal chain, making your calibration readings worthless. I always set up a shielded enclosure if I can, something to block EMI. And temperature? Oh, you have to let the amp warm up. Most specs are given at a stable 25°C, but if you calibrate it cold, as soon as it heats up from operation, that offset voltage will shift. Thirty minutes, at least—let it settle. Rushing that step is a rookie mistake, and I’ve made it more than once.
Then there’s the equipment you use to calibrate. You can’t check a 1µV offset with a multimeter that only reads down to 1mV. You need a precision signal generator, something that can output microvolt-level signals with low noise. A good oscilloscope with a low-noise probe helps, but honestly, a high-resolution ADC or a lock-in amplifier is better for really tiny signals. And don’t skimp on the power supply. A noisy supply will make the amp’s output jitter, and you won’t know if it’s the amp or the power that’s causing the error. I once spent hours troubleshooting an amp that “wouldn’t calibrate,” only to realize my bench supply was putting out 10mV of ripple. Swapped in a linear regulator, and suddenly everything worked.
The actual calibration process—offset adjustment is usually first. You ground the input, measure the output, then tweak the trim pot or send a calibration signal to the digital potentiometer if it’s a modern amp with I2C controls. But here’s the thing: offset can drift with temperature, so maybe you do a two-point calibration—once at room temp, once at the high end of your operating range, then calculate a compensation factor. Gain calibration is trickier. You apply a known input signal, measure the output, and adjust the feedback resistors to get the exact gain you need. But resistors drift too, so using precision metal-film or even wirewound resistors in the feedback network makes a difference. I’ve seen amps calibrated to 0.1% gain accuracy fall off by 0.5% after a few months because the feedback resistor was a cheap carbon-composition part.
Digital calibration is becoming more common these days, with amps that have on-chip DACs or EEPROMs to store calibration coefficients. You send a command, it measures its own offset and gain, then writes the correction values to memory. It’s convenient, sure, but I’m a little skeptical of it. What if the on-chip measurement circuit has its own errors? I still like to verify with external equipment. A hybrid approach—let the chip do its digital calibration, then check it with your bench gear—feels safer.
And calibration isn’t a one-and-done thing. High-precision amps in industrial settings, say, in a factory where temperatures swing or vibration is constant—they need re-calibration every so often. Maybe quarterly, maybe annually. I worked on a system for measuring strain in bridge girders, and those amps had to be checked every six months. The vibration from traffic would slowly loosen a resistor, shift the gain, and suddenly the strain readings were off by kilograms. Not catastrophic, but enough to make the data unreliable.
At the end of the day, calibrating these amplifiers is about attention to detail. It’s about knowing your amp’s weaknesses—does it have more noise at low frequencies? Is the offset sensitive to supply voltage?—and designing your calibration steps to account for them. It’s not glamorous work. You’ll spend more time waiting for things to stabilize than turning knobs. But when you finish, and that amp outputs a clean, accurate signal even when the input is barely above the noise floor? It’s satisfying. More than that, it’s necessary. Because in applications like medical imaging or precision sensors, “close enough” isn’t good enough. The calibration is what turns a good amplifier into a reliable one.
https://www.sic-components.com/


Hot Products
View More-

G344315000 Excelitas Technologies
-

G344144000 Excelitas Technologies
-
G335540000 Excelitas Technologies
-
G344211000 Excelitas Technologies
-

G344134000 Excelitas Technologies
-
G335530000 Excelitas Technologies
-

G344313000 Excelitas Technologies
-
G344335000 Excelitas Technologies
-
G344141000 Excelitas Technologies
-

G344169000 Excelitas Technologies
-

G344205000 Excelitas Technologies
-

G344212000 Excelitas Technologies
Related Blogs
-
2025 / 08 / 01
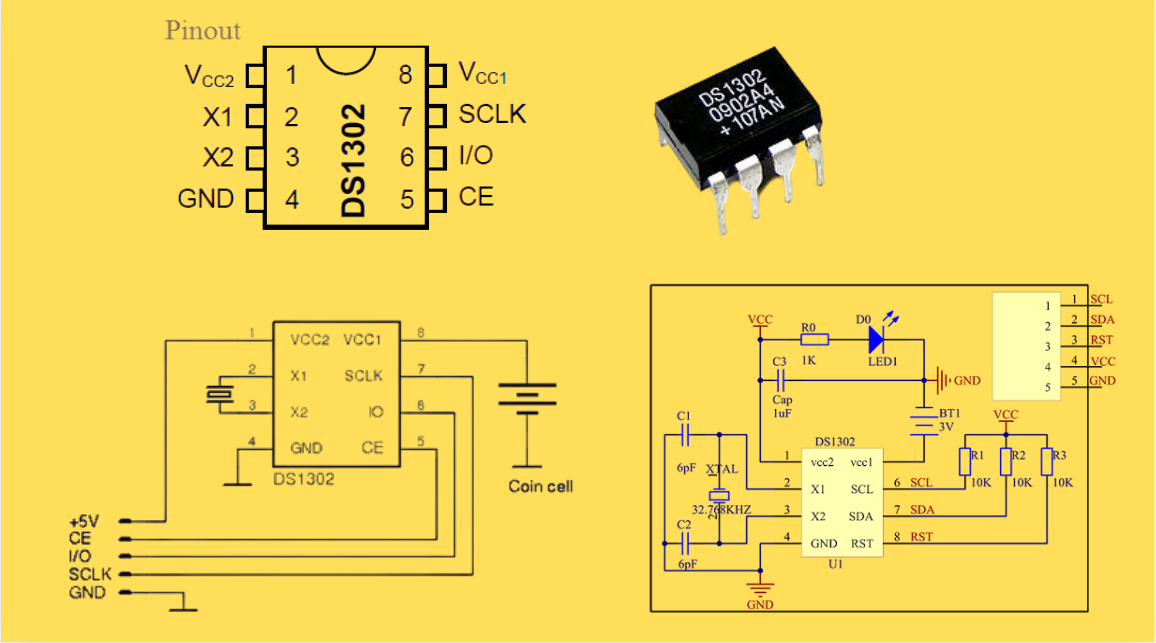
DS1302 RTC: Datasheet,Attributes,Features,Applications
As a low-power device widely used in electronic equipment, the DS1302 is centered on accurate real-time clock/calendar recording functions. It supports full-dimensional tracking of seconds, minutes, hours, days, weeks, months, and years, features automatic leap year compensation, and is compatible w...
-
2025 / 07 / 30
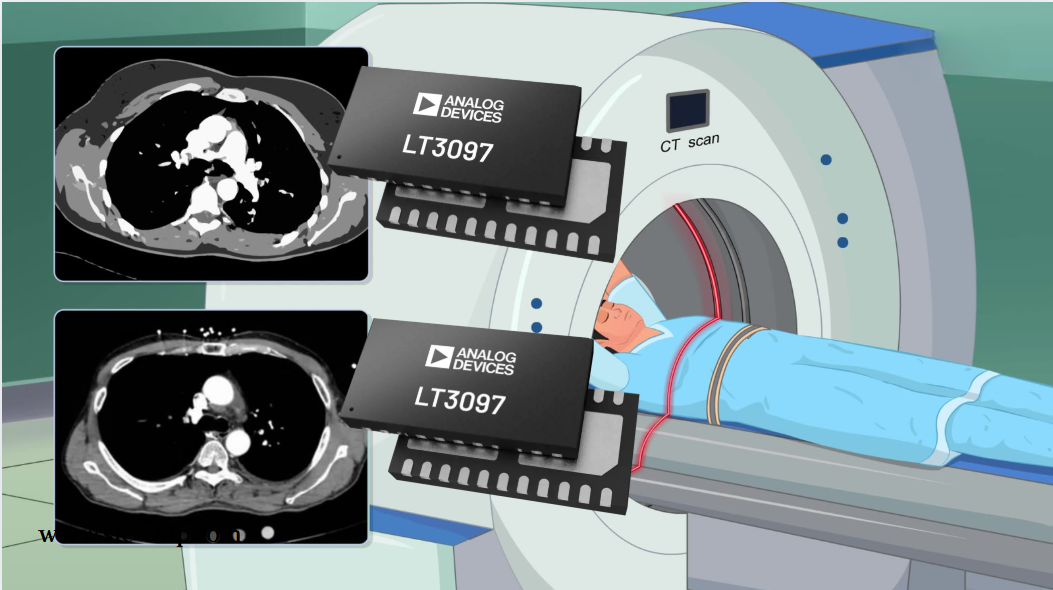
LT3097 Dual 500 mA, positive/negative, ultralow noise, ultrahigh PSRR low dropout linear regulator
The LT3097 is a dual, positive and negative, high-performance, low-dropout linear regulator featuring Analog Devices, Inc., ultralow noise and ultra-high power supply rejection ratio (PSRR) architecture for powering noise-sensitive applications. Each regulator delivers up to 500 mA with a typical 26...
-
2025 / 07 / 28
What is a Digital Integrated Circuit?
In the fast - paced world of modern electronics, digital integrated circuits (ICs) are the unsung heroes that power everything from our smartphones and laptops to complex supercomputers and industrial control systems. But what exactly is a digital integrated circuit?...

-
2025 / 07 / 25
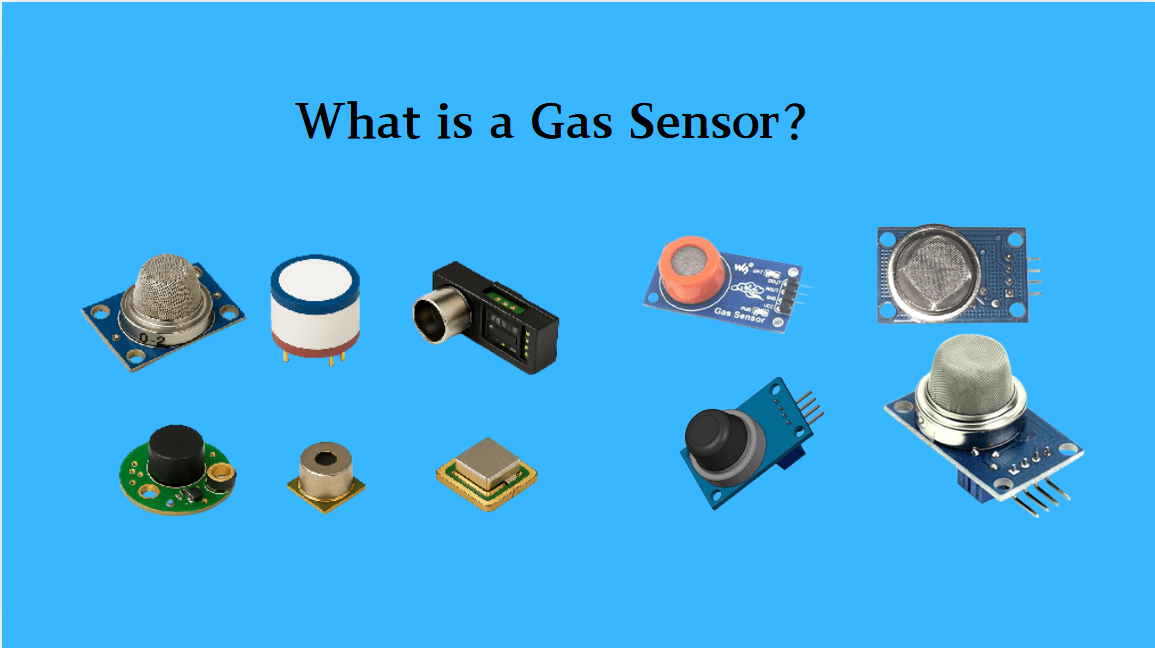
What is a Gas Sensor?
A gas sensor is a device that can convert information such as the composition and concentration of gas into electrical signals recognizable by electronic equipment. It is like the "olfactory organ" of an electronic system, capable of acutely detecting the presence of specific gases in the environmen...
-
2025 / 07 / 24
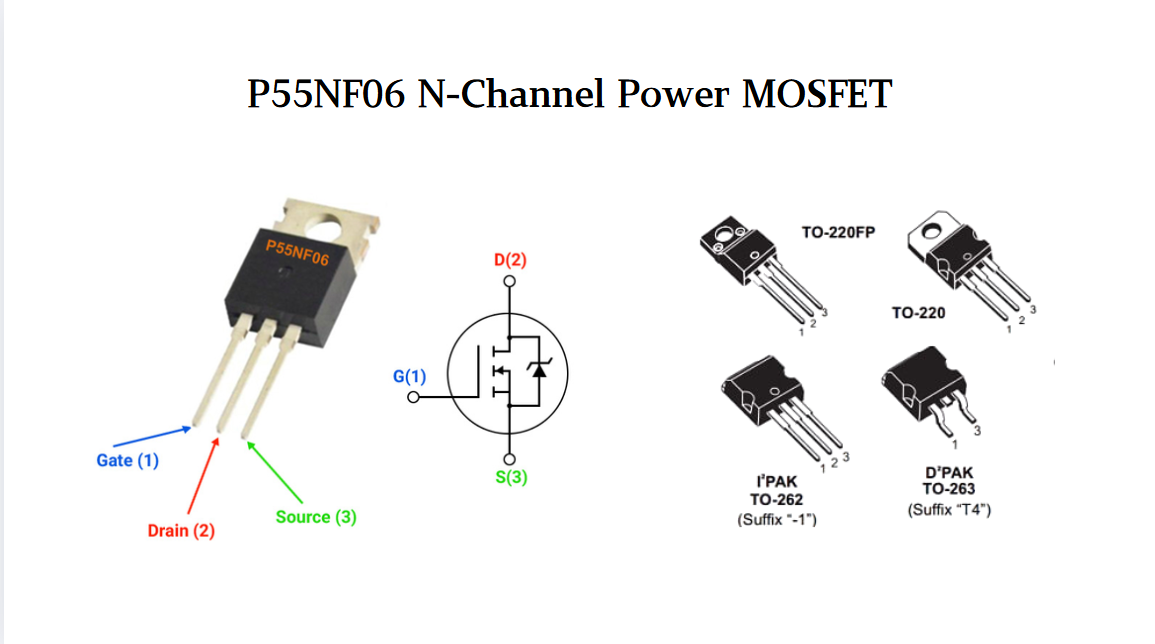
P55NF06 N-Channel Power MOSFET: Everything You Need To Know
In the vast landscape of semiconductor devices, MOSFETs (Metal - Oxide - Semiconductor Field - Effect Transistors) play a pivotal role, especially in power electronics. Among the numerous MOSFET models available, the P55NF06 stands out for its unique combination of features, making it suitable for a...
-
2025 / 07 / 23
Operational Amplifier Filters: A Comprehensive Analysis from Fundamentals to Applications
In electronic systems, the purity and accuracy of signals directly determine the performance of devices. Electronic filters composed of operational amplifiers (op-amps) have become a "bridge" connecting original signals and valid information, thanks to their ability to precisely filter signal freque...

-
2025 / 07 / 19
Broadcom BCM5714CKPB: Featrues,Applications,Datasheet And Advantages
When it comes to reliable, high-performance network connectivity in enterprise and industrial systems, the Broadcom BCM5714CKPB stands as a standout solution. This dual-port Gigabit Ethernet controller, developed by Broadcom—a leader in semiconductor innovation—combines robust features, versatile co...

-
2025 / 07 / 15
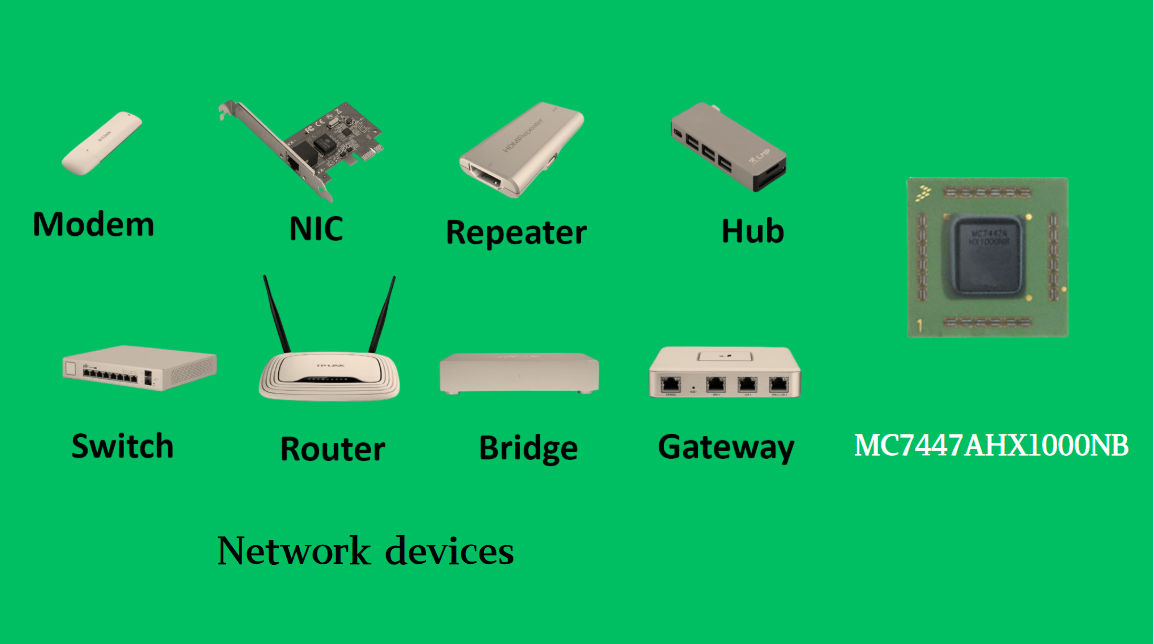
MC7447AHX1000NB: Technical Analysis and Applications of a High-Performance PowerPC Architecture Proc
In the field of embedded computing and network systems, the performance, energy efficiency, and compatibility of processors are often crucial to the success of a design. The MC7447AHX1000NB launched by NXP (formerly Freescale), as an important member of the MPC7447A series, has become an ideal choic...
-
2025 / 07 / 14
Nexperia Unveils New 1200V/20A SiC Schottky Diodes to Empower Efficient Industrial Power Innovations
Nexperia recently announced the addition of two new 1200V, 20A silicon carbide (SiC) Schottky diodes—PSC20120J and PSC20120L—to its power electronics portfolio, further expanding its product landscape in high-performance semiconductors. Specifically designed to address the increasingly stringent dem...

-
2025 / 07 / 09
CD4007: A Comprehensive Analysis of a Multifunctional CMOS Integrated Circuit
In the field of modern electronic technology, CMOS (Complementary Metal-Oxide-Semiconductor) integrated circuits have become core components in digital and analog circuit design due to their low power consumption, high integration, and excellent compatibility. As a classic CMOS device, the CD4007 oc...


2000+
Daily average RFQ Volume

30,000,000
Standard Product Unit

2800+
Worldwide Manufacturers

15,000 m2
In-stock Warehouse
 Wishlist (0 Items)